If you're looking for a fun, indulgent treat that combines classic flavors with a playful twist, this Cookie Monster Cheesecake Bars Recipe is a perfect choice. These bars are a layered delight-blondie base meets creamy, blue-tinged cheesecake packed with crushed Oreos, all topped with a glossy chocolate ganache. I like making these for weekend gatherings or whenever I want a sweet pick-me-up that feels extra special yet approachable.

Jump to:
Why You'll Make This on Repeat
These Cookie Monster Cheesecake Bars bring together the best of crumbly blondies, creamy cheesecake, and crunchy cookies into one irresistible bite. Their vibrant blue hue and familiar Oreo crunch make them a crowd-pleaser, perfect for celebrations or whenever you want a nostalgic dessert with a modern kick.
- Reliable Texture: The balance between a dense blondie base and a silky cheesecake layer means every bite stays perfectly moist and luscious.
- Balanced, Cozy Flavor: Sweet vanilla, mellow brown sugar, and that hint of salt keep the flavors rounded and comforting, never too rich or cloying.
- Pantry-Friendly: With staples like cream cheese, Oreos, and simple baking ingredients, this recipe doesn't require a special grocery run.
- Weeknight Simple: Though layered, the process is straightforward and forgiving, making it a great choice even if you're juggling a busy schedule.
Ingredient Highlights

Choosing good-quality ingredients will elevate this Cookie Monster Cheesecake Bars Recipe. Since the blondie and cheesecake layers are relatively simple, you'll notice a big difference when using fresh butter, real vanilla, and smooth cream cheese.
- Unsalted Butter: I prefer unsalted to control the salt level, plus using real butter adds that rich, toasty flavor.
- Cream Cheese: Use full-fat, softened cream cheese for a silky, smooth cheesecake layer without lumps.
- Oreos: Classic regular Oreos crushed coarsely add crunch and that unmistakable cookie flavor.
- Blue Gel Food Coloring: Use gel rather than liquid for vibrant color without thinning the batter.

Quick Note: Exact measurements are in the printable recipe card at the bottom.
Step-by-Step for Cookie Monster Cheesecake Bars Recipe
Step 1 - Prep & Season
Start by preheating your oven to 350°F (175°C). Melt the unsalted butter in a small saucepan over medium heat; you'll want it glossy and fully melted but not browned. Stir in salt and brown sugar until they meld into a smooth, fragrant mixture. Take the pan off heat and whisk in the egg and vanilla extract right away-this helps the batter emulsify smoothly. When you stir in the flour, fold gently to avoid developing gluten; this keeps your blondie layer tender rather than cakey. Fold in the mini chocolate chips, then spread the batter evenly into your lined pan. Bake for about 15-20 minutes, checking by inserting a toothpick-it should come out clean or with just a few moist crumbs. Let it cool completely; this cool-down sets a sturdy base for your cheesecake layer.
Step 2 - Build Flavor
For the cheesecake layer, beat the softened cream cheese in a large bowl until completely smooth and lump-free-this step makes all the difference in that perfect silky texture. Add cornstarch, sugar, and a pinch of salt, and mix until well blended. Gradually whisk in the whipping cream, blue gel food coloring until you reach a vibrant hue, and vanilla extract. Add eggs one at a time, mixing just until combined after each addition to avoid overbeating which can cause cracks. Then, carefully fold in the crushed Oreos using a spatula, keeping that cookie texture intact. Pour this mixture evenly over the cooled blondie layer-you'll notice how beautifully the blue cheesecake contrasts with the golden base. Setting up a water bath by placing your baking pan inside a larger pan filled with hot water helps cook the cheesecake gently and evenly, preventing cracks and ensuring a creamy finish. Bake at 300°F (150°C) for 45-55 minutes until the center is just set but still slightly jiggly.
Step 3 - Finish for Best Texture
Once baking is complete, turn off the oven and let the cheesecake bars cool inside for an hour-this slow cooling helps avoid sudden temperature shocks that might crack your dessert. Afterward, refrigerate overnight; this step is key for full flavor development and that signature creamy, firm yet tender texture you want from cheesecake bars. For the final touch, gently microwave semisweet chocolate chips, heavy cream, and a pinch of salt in short bursts, stirring often until the ganache is luscious and glossy. Spread it evenly across the chilled cheesecake layer, and if you like, sprinkle with extra crushed Oreos to amp up texture and fun. Let the ganache set briefly before slicing and serving-this is when you'll get those clean, glossy squares that impress every time.
Kitchen Notes I Rely On
Over the years, I've found a few small but crucial habits that always help my Cookie Monster Cheesecake Bars Recipe come out beautifully. From making sure the cream cheese is room temp to not skipping the water bath, these tips keep things silky and crack-free.
- Doneness Cue: Look for cheesecake that's set around the edges but gently jiggles in the center-that means it's perfectly baked and won't dry out.
- Temperature Trick: Always beat eggs into the cheesecake mixture one at a time to maintain a smooth, stable batter.
- Make-Ahead Move: Refrigerate the bars overnight for flavors to deepen and texture to firm up before topping with ganache.
- Skip This Pitfall: Don't overbake! Too long in the oven dries out the cheesecake and ruins that luscious feel you want.
Serving & Sides

Finishing Touches
I like to keep the finishing touches simple for Cookie Monster Cheesecake Bars Recipe. The chocolate ganache layer adds stunning gloss and richness, while a sprinkle of extra crushed Oreos ups the crunch factor. You could also add a tiny dollop of whipped cream or a few fresh berries for a contrasting freshness if you're feeling fancy.
Pairs Nicely With
These bars pair well with a cup of strong coffee or creamy milk for classic balance. For adults, a light, slightly bubbly dessert wine complements the sweet richness without overpowering it. On texture, something crisp like a simple almond biscotti makes a nice counterpoint to the creamy layers.
Simple Plating Upgrades
If you want to elevate presentation quickly, try serving the bars on a bright platter with a sprinkle of edible gold dust or fresh mint leaves for color contrast. Cutting perfectly straight bars using a warm knife makes slicing neater, especially for parties. For a casual vibe, stack them on parchment paper-lined plates with scattered Oreos around.
Make-Ahead & Storage
Storing Leftovers
Store leftover Cookie Monster Cheesecake Bars in an airtight container in the fridge. I recommend layering with parchment paper between layers to prevent sticking. They keep well for up to 4 days and remain moist and fresh, though the edges might firm up slightly over time.
Freezer Tips
These bars freeze beautifully-wrap individual pieces tightly in plastic wrap and place in an airtight container or freezer bag. They'll last up to 2 months. Thaw overnight in the fridge for the best texture and to keep cheesecake shine intact. Avoid microwaving directly after freezing to prevent sogginess.
Reheating Cookie Monster Cheesecake Bars Recipe Without Drying Out
When reheating, use a gentle approach: a low heat oven (about 300°F) for 5-7 minutes covered with foil helps warm bars through without drying. For quick reheats, microwave in 10-second bursts on medium power with a damp paper towel over the top to maintain moisture. Air fryers work well too-just keep it low and short.
Frequently Asked Questions
Absolutely! Regular semisweet chocolate chips will work fine, just distribute them evenly so each bite has some chocolatey goodness. I find mini chips distribute more uniformly, but feel free to use what you have.
No, it's optional but adds that fun, iconic "Cookie Monster" look. If you skip it, the bars are still delicious-just with a classic cheesecake color.
You can try swapping the all-purpose flour for a gluten-free blend and using gluten-free Oreos, but results may vary slightly in texture. The blondie base might be a little less sturdy, so bake carefully and monitor doneness.
Baking in a water bath helps the cheesecake cook gently and evenly, preventing cracks and preserving that creamy texture you want. It keeps the environment moist and temperature steady during baking.
Final Thoughts
Making the Cookie Monster Cheesecake Bars Recipe is as enjoyable as eating the final product. The layers, textures, and colors all tell a story of classic comfort with a playful edge. I love having these bars ready for unexpected guests or to brighten up a busy weeknight dessert rotation. Trust me-once you try this recipe, you'll find yourself smiling every time you slice into those glossy, blue-tinted bars packed with cookie crunch.
PrintPrintable Recipe
Cookie Monster Cheesecake Bars Recipe
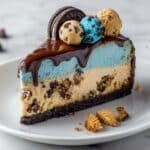
Cookie Monster Delight Bars combine a rich blondie base with a vibrant blue cheesecake layer studded with crushed Oreos, topped off with a smooth chocolate ganache and extra Oreo crumble for crunch. This indulgent dessert is perfect for fans of cookies and cream flavors looking for a visually striking and delicious treat.
- Prep Time: 45 minutes
- Cook Time: 75 minutes
- Total Time: 2 hours
- Yield: 12 servings
- Category: Dessert
- Method: Baking
- Cuisine: American
Ingredients
Blondie Base
- ½ cup unsalted butter
- ½ teaspoon salt
- ⅓ cup packed brown sugar
- 1 large egg
- 1 teaspoon vanilla extract
- ½ cup all-purpose flour
- ½ cup semisweet mini chocolate chips
Cheesecake Layer
- 16 ounces cream cheese, softened
- 2 teaspoons cornstarch
- ⅓ cup granulated sugar
- Pinch of salt
- ½ cup whipping cream
- Blue gel food coloring, as needed
- 1 teaspoon vanilla extract
- 3 large eggs
- 15 regular Oreo cookies, crushed
Chocolate Ganache Topping
- ¾ cup semisweet chocolate chips
- ½ cup heavy whipping cream
- Pinch of salt
Decoration
- Additional crushed Oreo cookies, optional
Instructions
- Prepare the Blondie Base: Preheat oven to 350°F (175°C). In a saucepan over medium heat, melt unsalted butter. Add salt and brown sugar, stirring continuously until well combined. Remove from heat and whisk in the egg and vanilla extract until fully incorporated. Stir in all-purpose flour just until combined, then gently fold in the semisweet mini chocolate chips. Spread this batter evenly in a prepared baking pan and bake for 15 to 20 minutes, or until a toothpick inserted in the center comes out clean. Allow to cool completely in the pan.
- Make the Cheesecake Layer: In a large bowl, beat the softened cream cheese until creamy and free of lumps. Add cornstarch, granulated sugar, and a pinch of salt; mix well until smooth. Gradually add whipping cream, blue gel food coloring to your preferred shade, and vanilla extract, mixing until uniform in color and texture. Add eggs one at a time, beating briefly after each addition just until combined. Fold in the crushed Oreo cookies using a spatula. Pour this cheesecake mixture evenly over the cooled blondie base.
- Bake the Cheesecake Layer: Place the pan inside a larger pan and fill the outer pan with hot water to create a water bath. Bake at 300°F (150°C) for 45 to 55 minutes, until the cheesecake layer is set but still slightly jiggly in the center. Turn off the oven and let the cheesecake cool inside for 1 hour, then remove and refrigerate overnight to achieve optimal texture.
- Prepare the Chocolate Ganache: In a microwave-safe bowl, combine semisweet chocolate chips, heavy whipping cream, and a pinch of salt. Microwave in 30-second intervals, stirring well after each interval, until the mixture is fully melted and smooth.
- Assemble and Serve: Spread the ganache evenly over the chilled cheesecake layer. Optionally, garnish with additional crushed Oreo cookies. Chill the bars slightly before slicing and serving for the best texture.
Notes
- Using a water bath helps prevent cracks in the cheesecake layer and ensures a smooth texture.
- Adjust the amount of blue gel food coloring to achieve your desired shade of blue.
- Allowing the bars to chill overnight improves the flavors and firmness.
- Use full-fat cream cheese and whipping cream for the best creamy texture.
- Ensure the blondie base is completely cooled before adding the cheesecake layer to prevent melting and mixing.


Leave a Reply