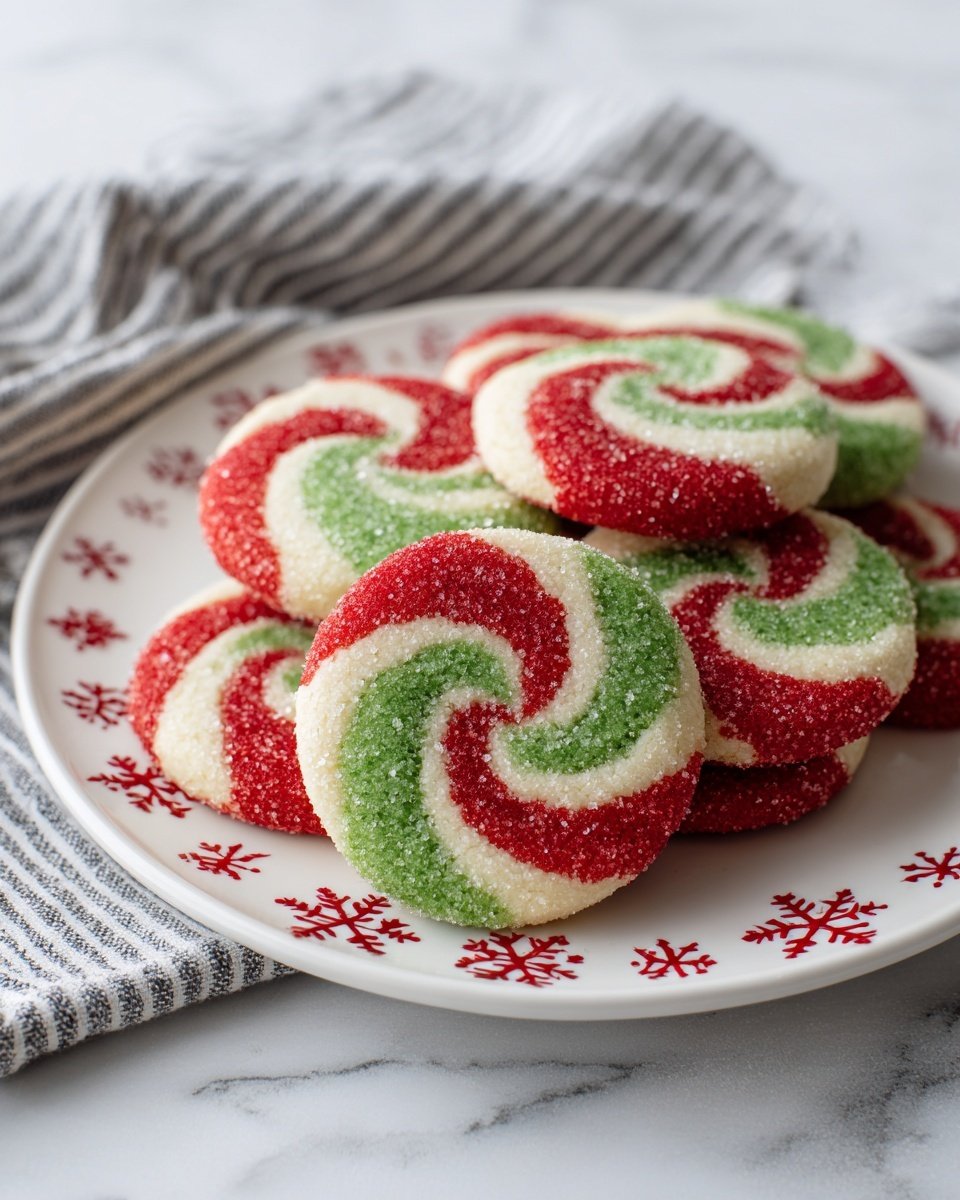
If you're looking for a charming, festive treat to brighten up your holiday baking, this Christmas Pinwheel Cookies Recipe is a perfect choice. These colorful, spiraled cookies are as delightful to look at as they are to eat-great for sharing at Christmas parties, gift-giving, or simply enjoying with a cozy cup of tea. I've found that making them is a joyful way to fill the kitchen with sweet, buttery aromas that instantly feel like holiday magic.
Jump to:
Why You'll Make This on Repeat
Once you try this Christmas Pinwheel Cookies Recipe, it's hard not to come back every holiday. The look is festive but simple, and the flavor strikes just the right balance of sweet and buttery that kids and adults alike adore.
- Reliable Texture: The dough stays tender and crumbly without spreading too much.
- Balanced, Cozy Flavor: Vanilla and a hint of lemon zest (if you choose) brighten the rich buttery base.
- Pantry-Friendly: Uses common baking staples with just a splash of holiday color for fun.
- Weeknight Simple: Easy steps and flexible chilling times let you bake at your pace.
Ingredient Highlights
For the best Christmas Pinwheel Cookies Recipe results, I like to focus on simple quality rather than specialty ingredients. A few small touches can really help these cookies stand out visually and taste-wise without complicating the process.
- Salted Butter: Softened but not melted, it gives richness and helps with the dough's buttery texture.
- Powdered & Granulated Sugar: Blending these creates a tender crumb with just enough sweetness.
- All-Purpose Flour: Provides structure for precise rolling and slicing.
- Gel Food Coloring: Concentrated color without affecting dough texture-essential for vibrant red and green hues.
- Holiday Nonpareils: Adds playful, festive crunch and sparkle on the cookie edges.
Quick Note: Exact measurements and details are in the printable recipe card at the bottom, so feel free to glance there when you're ready to bake.
Step-by-Step for Christmas Pinwheel Cookies Recipe
Step 1 - Prep & Season
Start by letting your salted butter sit out until soft, around room temperature-not melted. Then, in a mixer, beat the butter with both granulated and powdered sugar until the mixture looks light and fluffy-this usually takes about 3 to 4 minutes. You'll notice the color lighten as air gets incorporated. Next, add your eggs and vanilla extract, blending slowly at first to avoid splashing. Take a moment to scrape the bowl's sides and bottom to mix every bit evenly, ensuring your cookies have consistent flavor and texture.
Step 2 - Build Flavor
Now it's time to add the dry ingredients: sift together your all-purpose flour, baking powder, and salt. Slowly mix these into the butter mixture until just combined-overmixing can toughen dough, so stop as soon as you see no dry streaks. Then you'll divide the dough into three even balls. One stays plain, while the other two get vibrant: knead red gel food coloring into one third, and green into the next. I like to add 5 to 10 drops, mixing thoroughly until the colors are evenly distributed with no marbling.
Step 3 - Finish for Best Texture
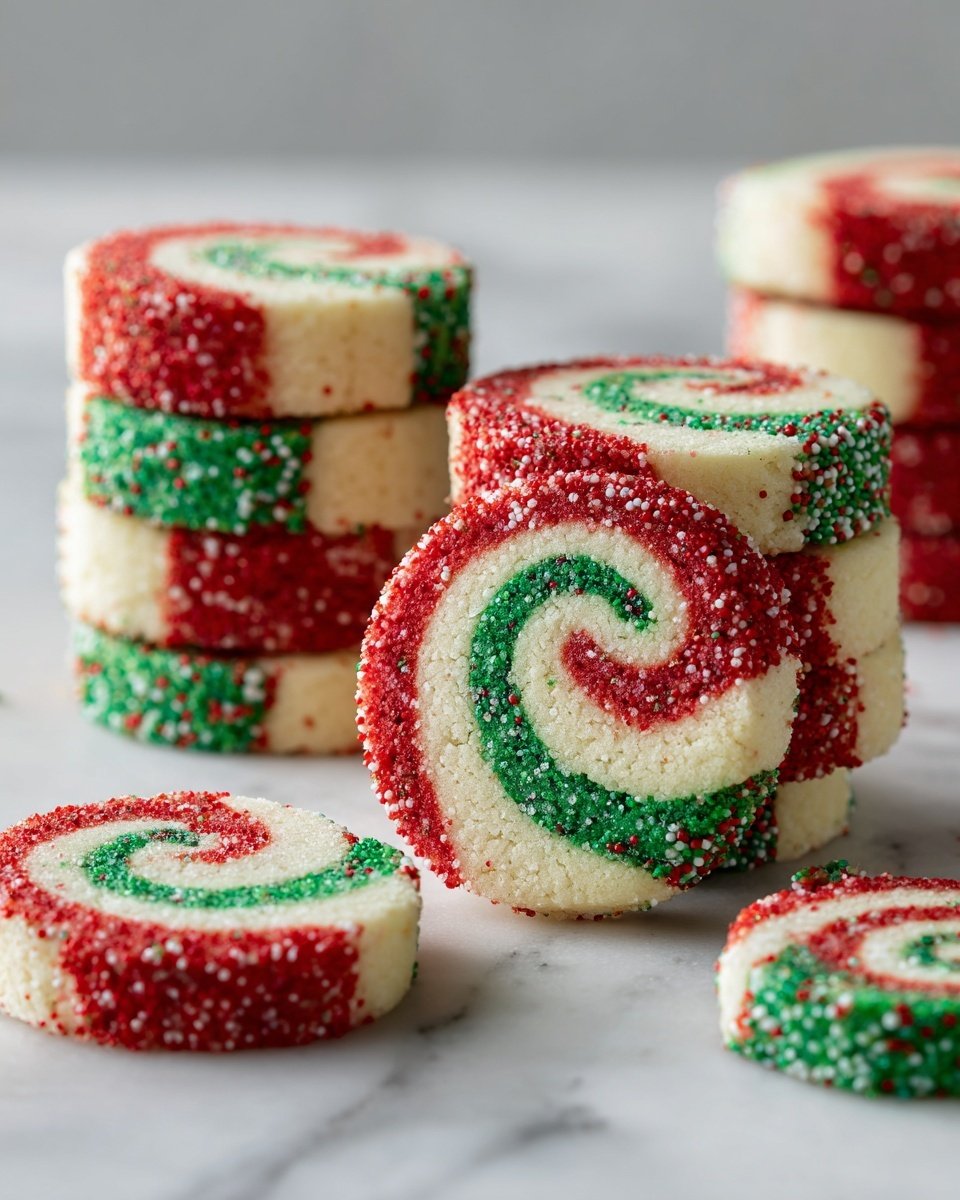
Flatten each dough ball into discs, wrap tightly in plastic, and chill. You can freeze them for 20 minutes or refrigerate for at least an hour-this resting step firms them up for rolling out smoothly. Roll each disc into even rectangles on parchment paper, stacking them with the plain dough in the center, flanked by the red and green layers. Trim edges so all layers line up neatly. Then, carefully roll the dough stack into a tight log, using the parchment paper to help keep the roll firm and crack-free. Wrap again and chill in the fridge for minimum 1-2 hours before coating with holiday nonpareils and slicing.
Kitchen Notes I Rely On
From my experience, the success of this Christmas Pinwheel Cookies Recipe is all about temperature control and patience. Keeping the dough cool makes rolling and slicing a breeze, plus it really helps keep those spiral layers crisp and defined.
- Doneness Cue: Look for edges to be set and just starting to turn golden.
- Temperature Trick: Chill dough logs until firm but not frozen solid to slice easily.
- Make-Ahead Move: Slice and freeze cookies on baking sheets before baking for fresh cookies anytime.
- Skip This Pitfall: Avoid overworking colored dough to prevent color bleeding and tough texture.
Serving & Sides
Finishing Touches
I love these cookies paired with a simple dusting of powdered sugar if you want extra flair, but honestly, the vibrant pinwheels and sprinkles are stunning on their own. A gentle glaze of vanilla icing would add shine and sweetness, but keep it light so you don't overpower the buttery base. Sprinkle with a few extra nonpareils just before baking if you want a little extra holiday sparkle.
Pairs Nicely With
These cookies go beautifully with a warm cup of spiced chai or classic eggnog during the season. For a balance of textures, try serving alongside creamy hot chocolate topped with whipped cream or even a simple glass of cold milk. The rich buttery cookie and spicy drink pairings create that cozy, festive feeling everyone looks for.
Simple Plating Upgrades
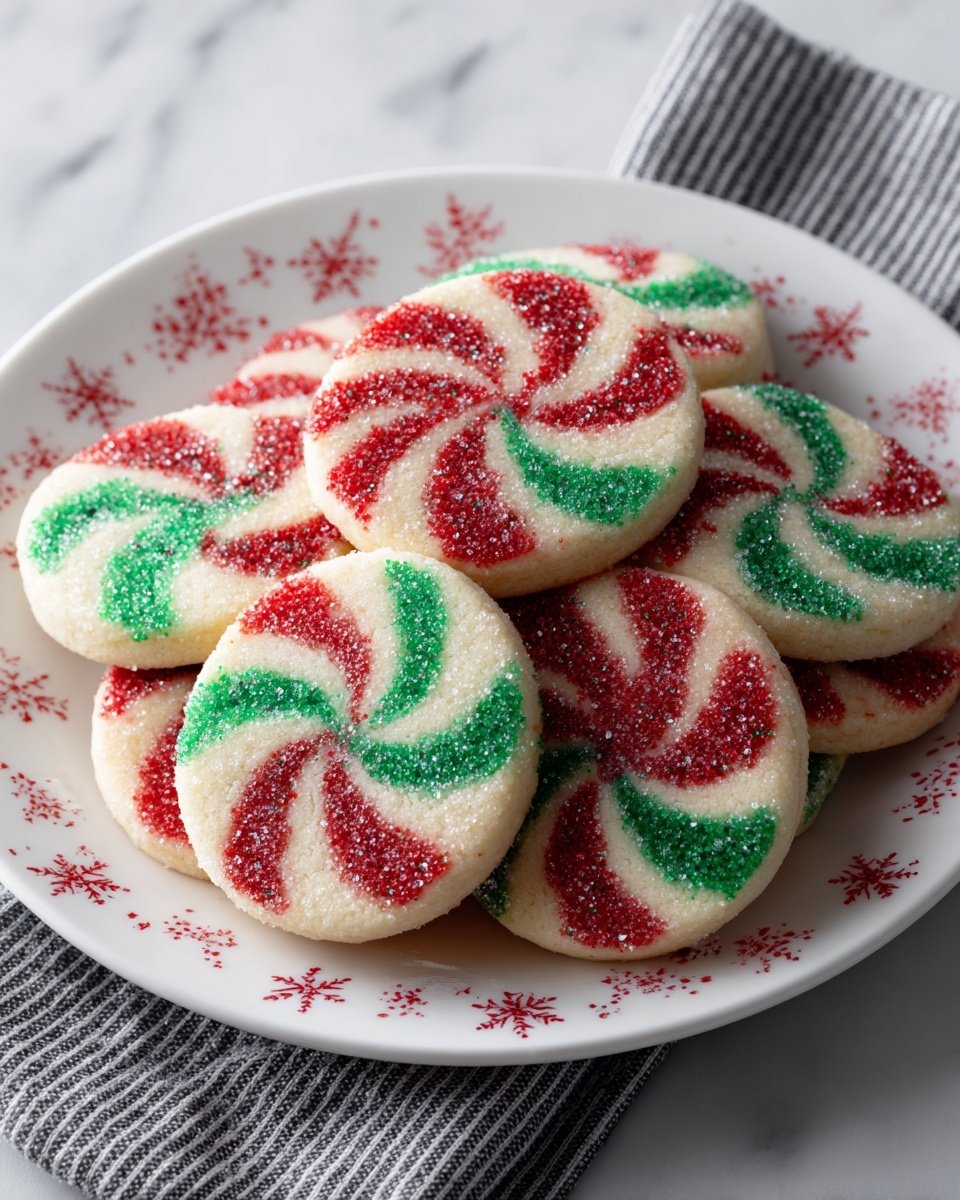
If you're hosting a holiday get-together, arrange the pinwheels on a decorative platter with scattered fresh rosemary or holly sprigs for a natural, festive touch. You can also stack small piles tied with red and green ribbon for giving as edible gifts. These touches make your baking feel extra special without extra fuss.
Make-Ahead & Storage
Storing Leftovers
Store leftover Christmas Pinwheel Cookies in an airtight container at room temperature for up to 5 days. I've found that adding a slice of bread wrapped in parchment helps keep them soft. If you prefer a crisper bite, just leave out the bread and enjoy the texture that way.
Freezer Tips
These cookies freeze very well-either store the whole dough log wrapped tightly or freeze baked cookies in airtight containers. To freeze dough logs, wrap each one twice with plastic wrap and place in a freezer bag; they'll keep up to 3 months. When ready, thaw overnight in the fridge and slice fresh for baking. This makes holiday prep stress-free and lets you bake just what you need.
Reheating Christmas Pinwheel Cookies Recipe Without Drying Out
To enjoy these cookies warm without drying them, briefly microwave for 10-15 seconds at 50% power or wrap in foil and heat in a 300°F oven for about 5 minutes. A quick air-fryer blast (around 320°F for 3 minutes) also revives their slightly soft texture. Just be careful not to overheat, or the buttery richness can evaporate.
Frequently Asked Questions
Absolutely, but I recommend gel food coloring because it doesn't add extra liquid, helping keep the dough firm and easy to roll. Liquid colorings can make dough sticky or too soft.
Chilling each colored dough before assembling and handling the dough gently will help maintain clean, sharp pinwheel layers. Avoid overworking or mixing the layers once stacked.
Yes! Adding about ½ teaspoon of warm spices can give the cookie a cozy holiday twist, but just a small amount so it doesn't overpower the delicate vanilla flavor.
Use a sharp knife and slice in one smooth motion without sawing. For cleaner cuts, chill the log well beforehand and warm your knife under hot water, then dry it before slicing.
Final Thoughts
Every holiday season, this Christmas Pinwheel Cookies Recipe reminds me why I love baking so much-the colors, the smells, and most of all, the smiles that come with sharing them. Whether you're a seasoned baker or just trying your hand at festive treats, these cookies offer an approachable way to bring a little extra joy to your celebrations. Give them a try, and I bet you'll find yourself making them every year, too.
PrintPrintable Recipe
Christmas Pinwheel Cookies Recipe

These festive Christmas Pinwheel Cookies feature a delightful swirl of red, green, and white dough, coated with holiday-colored nonpareils. Perfect for holiday celebrations, these buttery, vanilla-flavored cookies are not only visually stunning but also tender and flavorful, making them a fun and festive treat for all ages.
- Prep Time: 15 minutes
- Cook Time: 12 minutes
- Total Time: 2 hours 27 minutes
- Yield: 36 cookies
- Category: Dessert
- Method: Baking
- Cuisine: American
Ingredients
Dough
- ¾ cup salted butter softened to room temperature
- ¾ cup (150g) granulated sugar
- ¾ cup (150g) powdered sugar
- 2 large eggs
- 2 teaspoons vanilla extract
- 2 ½ cups (353g) all-purpose flour
- ½ teaspoon baking powder
- ½ teaspoon salt
- Optional: ½-1 teaspoon of additional flavoring extracts or lemon zest
Coloring and Decoration
- Red gel food coloring
- Green gel food coloring
- Holiday colored nonpareils
Instructions
- Prepare dough base: Combine the softened butter, granulated sugar, and powdered sugar in a mixer. Beat well until the mixture is light and fluffy, which takes about 3-5 minutes.
- Add eggs and flavoring: Add in the eggs, vanilla extract, and optional additional flavorings such as lemon zest or another extract. Scrape down the sides and bottom of the bowl to ensure all ingredients are incorporated.
- Mix dry ingredients: Add the all-purpose flour, baking powder, and salt to the mixture. Mix until just combined to form the cookie dough. Divide the dough evenly into three balls.
- Color the dough: Return one third of the dough to the mixing bowl and add 5-10 drops of red gel food coloring. Mix thoroughly until the dough is evenly colored. Repeat this with another third of the dough using green gel food coloring, leaving one third plain (white).
- Chill dough discs: Flatten each colored dough ball into a disc shape. Wrap individually in plastic wrap. Chill in the freezer for 20 minutes or in the refrigerator for 1 hour to firm up the dough for easier rolling.
- Roll out and layer dough: Roll out each chilled dough disc on parchment paper to roughly the same rectangle size and shape. Stack the layers with the green and red dough on the top and bottom and the white dough in the middle. Trim the long edges so all layers are even.
- Roll into log: Carefully roll the layered dough stack into a tight log using the parchment paper to lift and help roll smoothly to avoid cracking. Wrap the log tightly in plastic wrap and chill in the refrigerator for at least 1-2 hours to firm up.
- Coat with nonpareils: Remove the dough log from the refrigerator. Unwrap and roll the log in holiday colored nonpareils placed on a baking sheet, pressing firmly to ensure good coverage of sprinkles on the outside.
- Slice cookies: Preheat the oven to 350°F. Line a baking sheet with parchment paper. Cut off any uneven ends from the log and slice the dough into ¼-inch thick cookies using a sharp knife. Place the cookies 1-2 inches apart on the prepared baking sheet.
- Bake and cool: Bake the cookies for 12 minutes until they are set but not browned. Remove from oven and cool completely on a wire rack before serving or storing.
Notes
- Be sure to chill the dough well at each stage to make rolling and slicing easier and to prevent spreading during baking.
- You can substitute the all-purpose flour with a gluten-free flour blend if needed, but texture may vary slightly.
- Use gel food coloring to avoid adding extra moisture to the dough, which could affect consistency.
- To store, keep sliced dough logs wrapped tightly in the refrigerator for up to one week or freeze for longer storage.
- Press the nonpareils firmly onto the dough to ensure they stick well and provide a festive look.


Leave a Reply