The Christmas Cheesecake Bars Recipe is a delightful treat that combines creamy cheesecake with festive cherry and almond toppings, perfect for holiday gatherings or cozy winter nights. When you make these bars, you'll enjoy the balance of buttery crumbly crust, luscious filling, and a toasty almond crunch that feels like a warm holiday hug in every bite.
Jump to:
Why You'll Make This on Repeat
I keep coming back to this Christmas Cheesecake Bars Recipe because it's just so effortless and rewarding - no complicated techniques, just a few pantry staples turning into a glossy, fragrant holiday dessert that everyone loves. The texture is reliably smooth, and that pop of cherry on top feels festive without being too sweet.
- Reliable Texture: Creamy cheesecake filling with a crisp-yet-tender sugar cookie crust every single time.
- Balanced, Cozy Flavor: The cherry pie filling adds a perfect tart contrast to the rich cream cheese base.
- Pantry-Friendly: Uses standard baking ingredients you likely already have, plus store-bought pie filling for convenience.
- Weeknight Simple: Straightforward mixing and baking steps that suit busy holiday prep days.
Ingredient Highlights

Choosing quality ingredients will elevate your Christmas Cheesecake Bars Recipe without any extra hassle. I always pick fresh cream cheese and a flavorful sugar cookie mix for the best results - it really makes each layer shine.
- Sugar Cookie Mix: Go for a brand with good flavor and texture-it forms the buttery crust and crumb topping.
- Butter: Use cold, unsalted butter for that perfect crumbly crust texture.
- Cream Cheese: Make sure it's softened to room temperature to avoid lumps and ensure a smooth filling.
- Cherry Pie Filling: Pick one with whole cherries for that delightful burst in each bite.
- Sliced Almonds: Toasted or raw will work, but toasting adds a lovely, fragrant nuttiness.
Quick Note: Exact measurements are in the printable recipe card at the bottom.
Step-by-Step for Christmas Cheesecake Bars Recipe
Step 1 - Prep & Season
Begin by preheating your oven to 350°F. Lightly spray an 8 x 8-inch pan with non-stick spray to ensure easy removal later. In a small bowl, combine the sugar cookie mix and cold, cubed butter using a fork until the mixture becomes perfectly crumbly. You'll notice little buttery clumps when it's just right-that's exactly the texture you want. Set aside about ¾ cup of this crumble for later, then press the rest firmly into the bottom of your pan. Bake for 10 minutes until golden and lightly puffed, then pop it in the fridge to cool quickly. This pre-baking step sets a sturdy and flaky base that holds the cheesecake layer beautifully.
Step 2 - Build Flavor
While the crust chills, it's time to whisk up the cheesecake filling. Beat together softened cream cheese, sugar, flour, vanilla, and an egg until silky and creamy - no lumps! A hand mixer works wonders here, but a sturdy whisk does the trick if you don't have one handy. Once smooth, spread the mixture evenly over your chilled crust, covering it completely for that glorious texture contrast. Then, spoon the cherry pie filling over the top and gently spread it out. You'll appreciate how the glossy cherries peek through, adding a rich red festivity that smells like the holidays.
Step 3 - Finish for Best Texture
Take the reserved crumble and stir in the sliced almonds, then sprinkle this nutty topping evenly across the cherry layer. Baking for 40 minutes melds these flavors and textures beautifully - the cheesecake firms up with a tender bite, the cherries remain juicy, and the topping toasts to an irresistible golden finish. Keep an eye near the end to avoid overbaking, which can dry out the cheesecake. Once out of the oven, let the bars cool for about 30 minutes, then refrigerate until set and cold. This chill time helps the bars hold their shape when you slice them.
Kitchen Notes I Rely On
From experience, teasing out the right texture and ripeness of your ingredients sets this Christmas Cheesecake Bars Recipe apart. It's the little things - chilling your crust, softening cream cheese just enough, and observing your bake carefully - that guarantee a luscious bar every time.
- Doneness Cue: Look for a slightly jiggly center when gently nudging the pan - it will firm up as it cools.
- Temperature Trick: Always bring cream cheese to room temp before mixing for smooth filling with no lumps.
- Make-Ahead Move: These bars keep well refrigerated and even taste better the next day after flavors have melded.
- Skip This Pitfall: Avoid overbaking, which can crack the surface and dry out the cheesecake.
Serving & Sides

Finishing Touches
I love serving these Christmas Cheesecake Bars Recipe slices with a light dusting of powdered sugar or a drizzle of melted white chocolate for extra holiday flair. The almond crunch on top adds a welcome texture complement that makes each bite a little more special.
Pairs Nicely With
These bars pair beautifully with hot drinks like rich coffee, spiced tea, or even mulled wine to enhance the cozy holiday vibe. For a refreshing balance, I sometimes add a simple fruit salad or fresh cranberries alongside-the tart fruit cuts through the creamy sweetness perfectly.
Simple Plating Upgrades
For a quick upgrade, plate the bars on a festive nursery with some sprigs of fresh rosemary or a few sugared cranberries to mirror the almond topping's nuttiness visually. A folded linen napkin and rustic wooden board make these bars feel extra warm and inviting, perfect for Christmas entertaining or a sweet holiday afternoon treat.
Make-Ahead & Storage
Storing Leftovers
Keep your Christmas Cheesecake Bars in an airtight container or tightly wrapped in plastic wrap to prevent drying out. Stored in the fridge, they maintain their creamy texture and fresh flavors for up to five days - perfect for enjoying leftovers throughout the week.
Freezer Tips
These bars freeze well when wrapped tightly in plastic and placed in a freezer-safe container. To thaw, move them to the fridge for 12 hours, which preserves their texture better than room temperature thawing. After thawing, they're almost as good as fresh-so I often keep a batch on hand for last-minute treats.
Reheating Christmas Cheesecake Bars Recipe Without Drying Out
If you want to serve these bars warm, gently heat them in the microwave in short 10-second bursts, covering loosely with a damp paper towel to keep moisture in. Alternatively, warming in a 300°F oven for 5-7 minutes wrapped loosely in foil prevents drying out. The almond topping stays crunchy, and the filling becomes irresistibly tender.
Frequently Asked Questions
Absolutely! Homemade dough works well as long as it has a crumbly texture for the crust and topping. Just make sure it's well chilled, and adjust baking time as needed to avoid overbaking.
Yes, feel free to swap in your favorite pie filling like blueberry or apple. The almond crumble topping complements a variety of fruit flavors, so get creative!
Mix the filling just enough to combine, avoid overbeating, and don't open the oven door during baking. Cooling the bars gradually after baking also helps keep the surface smooth.
You can try plant-based cream cheese alternatives and vegan butter, but results may vary. The texture and flavor might differ slightly, so it's best to experiment with trusted dairy-free brands.
Final Thoughts
Making the Christmas Cheesecake Bars Recipe always feels like a little holiday magic in my kitchen. It's a dessert that's approachable but impressive, balancing festive flavors and textures with simplicity and warmth. I hope you enjoy making it as much as I do - and that it finds its way into your seasonal traditions, bringing smiles and sweet moments all season long.
PrintPrintable Recipe
Christmas Cheesecake Bars Recipe

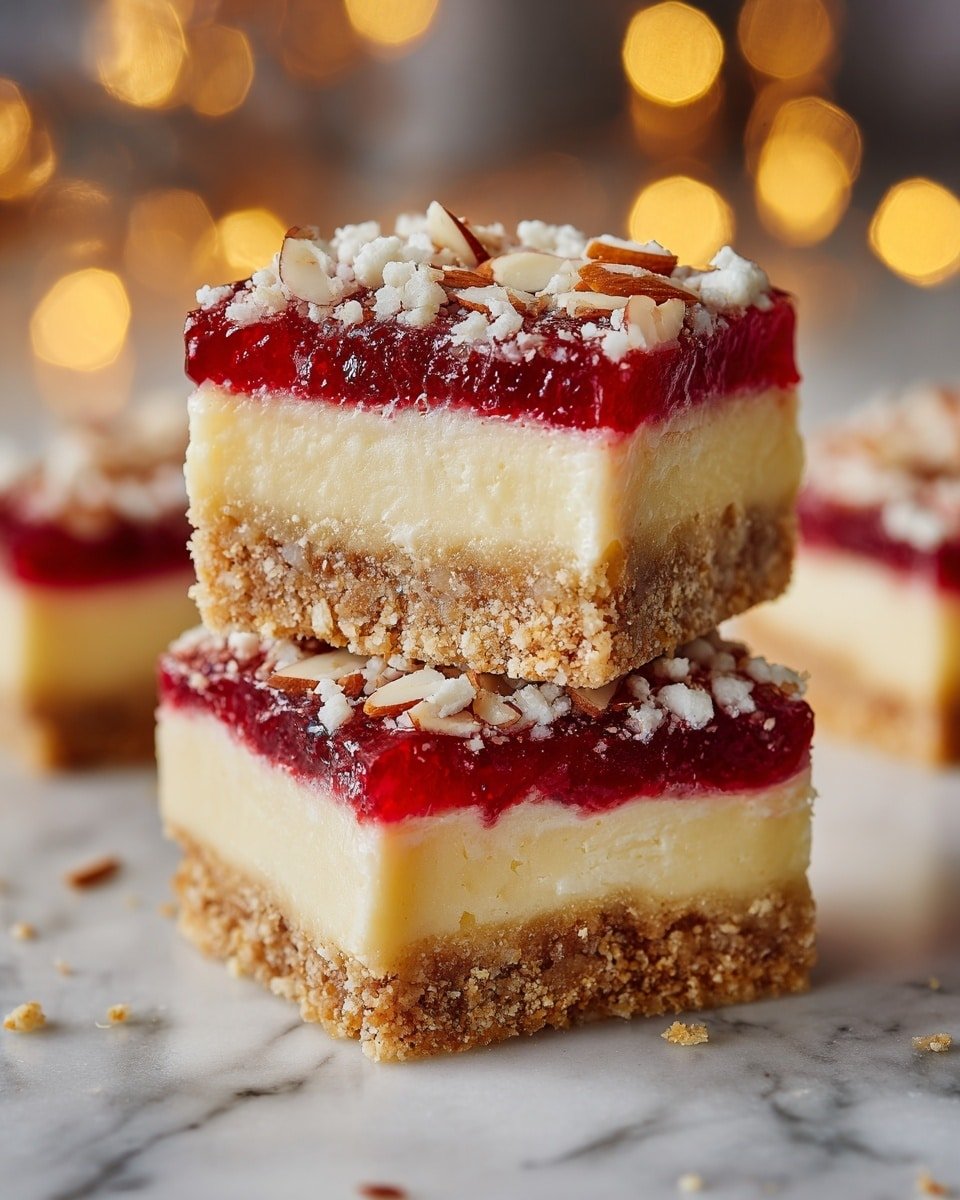
These Christmas Cheesecake Bars feature a buttery sugar cookie crust topped with a creamy cheesecake layer, festive cherry pie filling, and a crunchy almond crumble topping, perfect for holiday celebrations and dessert gatherings.
- Prep Time: 30 minutes
- Cook Time: 50 minutes
- Total Time: 80 minutes
- Yield: 16 bars
- Category: Dessert
- Method: Baking
- Cuisine: American
Ingredients
Crust and Topping
- 1 (8.5 oz) sugar cookie mix
- 4 tablespoon butter, cold and cubed
- ⅓ cup sliced almonds
Cheesecake Filling
- 1 (8 oz) cream cheese, softened
- ¼ cup sugar
- 1 tablespoon flour
- ½ teaspoon vanilla extract
- 1 egg
Topping
- ¾ can cherry pie filling (approximately 12 oz)
Instructions
- Preheat Oven: Preheat your oven to 350 degrees Fahrenheit. Spray an 8 x 8 inch pan with non-stick cooking spray and set aside.
- Prepare Crust: In a small bowl, combine the sugar cookie mix and cold, cubed butter. Use a fork to mix until the mixture becomes crumbly.
- Reserve Crumble: Set aside ¾ cup of this crumble mixture for the topping later. Press the remaining mixture firmly into the bottom of the prepared pan to form the crust.
- Bake Crust: Bake the crust in the oven for 10 minutes, then remove and place in the refrigerator to cool quickly.
- Make Cheesecake Filling: While the crust cools, beat together the softened cream cheese, sugar, flour, vanilla extract, and egg until the mixture is smooth and creamy.
- Assemble Cheesecake Layer: Spread the cheesecake mixture evenly over the cooled crust, ensuring full coverage.
- Add Cherry Pie Filling: Spoon the cherry pie filling evenly over the cheesecake layer.
- Prepare Topping: Stir the sliced almonds into the reserved crumble mixture. Sprinkle this almond crumble evenly over the cherry pie topping.
- Bake Bars: Return the assembled pan to the oven and bake for 40 minutes until set.
- Cool and Chill: Remove from oven and let cool for 30 minutes. Then refrigerate until cold and firm before cutting and serving.
Notes
- Use cold butter to achieve a crumbly crust texture.
- Allow the crust to cool completely before adding the cheesecake layer to prevent melting.
- Sliced almonds can be substituted with chopped pecans or walnuts for different nutty flavors.
- For easier slicing, chill the bars thoroughly in the fridge before cutting.
- If a smoother cheesecake texture is preferred, beat the cream cheese and sugar mixture longer to remove lumps.


Leave a Reply